If you are new to GoBUNDLE, we strongly suggest you go through the "New to GoBUNDLE" wizard. It will take 5-10 minutes, but it gives you an entire rundown of all you need to know about GoBUNDLE and the initial settings.

Creating a Timeframe
First of all, open your account. Halfway down the menu on the left, there's a "GoBUNDLE" navigation.

Click on the '+ Create A Timeframe' button.
(This page will also display any timeframes you've previously booked, if any.)

1. Starting Address

You can click on 'Stores and address book' and select a previously-entered address to save you time.
When you're ready, click on 'Next' to move on.
2. Parcel Type
You'll then navigate to the 'Parcel type' subpage.

Again, it's a matter of just filling in the basic information. Check what type or type of item you plan on sending, and then give the Timeframe a name and any notes or extra details you have on the delivery.
Once you're happy with the information, you'll move to the 'Delivery window' subpage.
3. Hours
Here, first of all, select when you want the Timeframe to start.
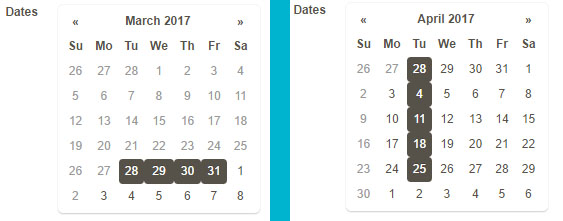
You can choose multiple dates if you wish. If you do so, the Timeframe's details will be replicated on all the selected dates.

Below that, choose the estimated duration of the timeframe.
As Senders must book a Timeframe for a minimum of 3 hours, the default value here will be 3 hours. Even if you need a Timeframe for only 1 or 2 hours, Senders will be charged for 3 hours.
4. Hire Runners
Now we'll move on to entering your requirements regarding Runners. You can click on the "Skip" link button if you are unsure how many Runners to hire and hire later.
Inputting some of these details is straightforward, while a few things need a bit of explanation.

a) Number of Runners
You know your business best, so you can choose the number of Runners you might need to hire for your Timeframe.
b) Vehicle
In this section, choose what vehicle you'll need or prefer to transport goods during the Timeframe. Different vehicles come with different rates (again, these rates are automatically adjusted).
NOTE: It is advised that if you anticipate a busy timeframe or have a business located in a CBD or other dense area, you choose 'Van'. GoPeople takes no responsibility if clients prefer a vehicular option that fails to have the physical capacity to complete the assigned task within the timeframe of the timeframe.
5. Summary
This page will display all the information you've put in and the calculated price below.
If you wish to change any information you've entered, click on the 'Edit' or the 'Back' buttons.

Once you're happy with all the information, click 'Confirm'.
You're All Done!
You'll now return to the Timeframe page with your Timeframe booked and waiting to be assigned a Runner:

On the left is the calendar; it will now display the dates you've booked your timeframe. Also, notice all the details of your timeframe (to look at them all, click the pie graph icon on the right).
A Runner has not been assigned, as this timeframe has just been created. Once you book a timeframe, considering how much notice has been given and how busy our Runners are, a Runner will be assigned in a short while.
On the right, there's a copy icon. Clicking this button will duplicate a timeframe, making up this guide's next part. If you don't want to duplicate your timeframe, there's no need to read on.
Duplicating A Timeframe
If you wish to duplicate timeframes, click the Copy icon (the two sheets). This will open a new window:

As you can see, all the information you entered before has been re-entered for you.
The only difference here is the 'Dates' section. By clicking on the days, you can add a timeframe, with the same details, on the day.
For example, you can duplicate the timeframe every day for a week, or you could create them every Tuesday for the next month. Click every day like an on/off button to get your desired schedule:


Last but not least, make sure you've read the additional terms & conditions that come with using GoBUNDLE.
 Help Center